
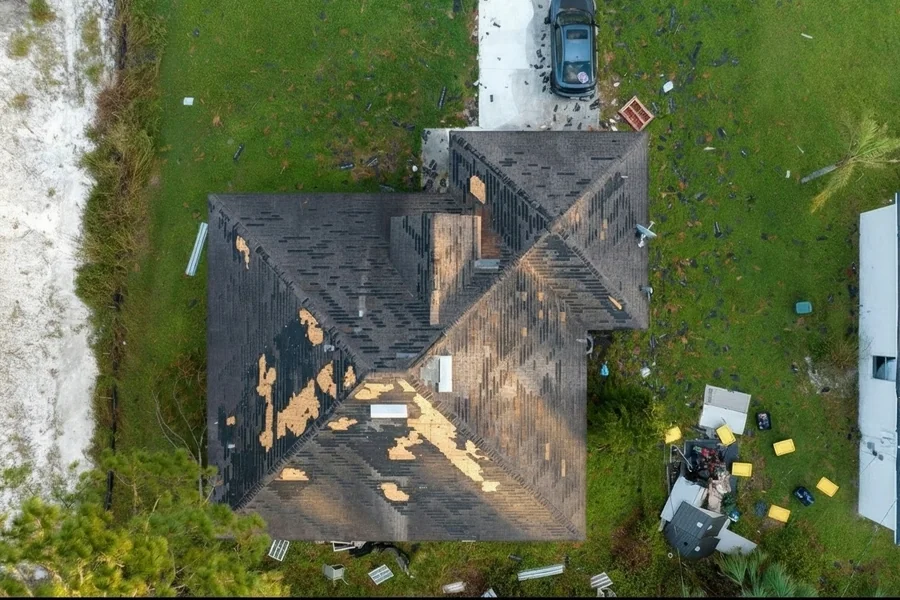

Most homeowners lose money on insurance claims not because the damage wasn’t real, but because they didn’t capture it correctly in the first 30 minutes. A burst pipe at 2 a.m., a kitchen fire, a flooded basement after a spring thaw — the instinct is to clean up, move things, and get back to normal as fast as possible. That instinct costs people thousands.
Before anyone touches a single damaged item, you need a documentation pass. This guide walks you through exactly how to do it — fast, in the right order, with nothing skipped.
Why the First Hour Defines Your Entire Claim
Insurance adjusters build their payout decisions almost entirely on evidence that existed at the time of loss. Once you throw out a soaked carpet or wipe soot off the walls, that evidence is gone. Your word against silence.
There’s also a physics problem. Water spreads. Mold starts forming on damp surfaces within 24 to 48 hours. Secondary damage from humidity can appear within hours if dehumidification hasn’t started. The damage your adjuster sees on day three is rarely the full picture of what happened on day one, and without documentation, proving that difference is nearly impossible.
The right move is to run a documentation pass before mitigation begins — not instead of it, not after it. Parallel to it, in the first available window when it’s safe to enter the space.
The STOP-WAIT-SHOOT Framework
This is the three-step mental model I recommend to every homeowner: Stop before you clean anything. Wait for safety clearance from emergency responders if the damage involves fire, structural collapse, or live electrical hazards. Shoot every inch of visible damage before anyone moves a single item.
The order matters. Skipping “wait” lands you in a dangerous structure. Skipping “stop” means you start moving evidence before recording it. And rushing the “shoot” phase is where most people leave real money on the table.
Here’s what the shoot phase actually means in practice:
- Start at the exterior. Walk the perimeter of the property and photograph roof, siding, windows, gutters, and foundation from multiple angles before you go inside.
- Move inside from the front door outward. Shoot each room with a wide establishing shot, then medium shots of each wall, then close-ups of every specific damage point.
- Open every closet and cabinet. Damage migrates into hidden spaces. A flooding event on the main floor often soaks the closet floor and the base of the drywall inside it.
- Shoot the ceiling, floor, and all four walls in every affected room. Adjusters expect a complete photo journal, not a highlight reel.
- Film a continuous walkthrough video after your stills. Narrate as you walk. Say the room name, describe what you’re seeing, and state the date and time out loud.
Turn on photo timestamps in your phone settings before you start. That metadata becomes part of the official record.
Fire and Smoke Damage: The Most Underestimated Category
Homeowners who’ve dealt with water damage generally know to photograph the wet areas. Fire damage is trickier because the visible burn zone is often far smaller than the actual damage zone. Smoke travels through HVAC systems, settles into attic insulation, and coats surfaces three rooms away from the fire’s origin.
According to the National Fire Protection Association (NFPA), the U.S. averages about 500,000 structure fires each year over the past ten years. Most of those are residential, and most homeowners who file claims afterward say the same thing: they photographed the charred areas and missed the smoke contamination on the other side of the house. Don’t make that mistake. Document every room, even the ones that look untouched. An adjuster who finds smoke residue in a room with zero photos of it will question whether it was pre-existing.
Use a flashlight against walls at an angle — smoke residue shows up dramatically in raking light that straight-on flash photography completely misses. That single technique has changed the scope of more than a few restoration projects. You can read more about how the National Fire Sprinkler Association analyzed NFPA structure fire trend data, which confirms that residential fires represent the overwhelming majority of fire loss events, making this documentation step relevant to nearly any homeowner.
Build a Paper Trail Binder From Day One
Here’s a scenario that plays out constantly: A homeowner suffers a significant water loss. They photograph it well. But then they let the plumber in without getting a written estimate first, make two phone calls to their insurer without notes, and toss the receipt for the shop vac they bought at the hardware store. Weeks later, the adjuster disputes $900 of ancillary expenses because there’s no paper trail.
The Paper Trail Binder — a single physical folder or a shared digital folder — collects everything from the moment of loss forward. It should include:
- Photos and videos with timestamps, organized by room and by date
- A written damage log: date, time, location of each damage point discovered, and a brief description
- Every receipt for temporary repairs (tarps, boards, emergency rentals)
- Written contractor estimates and invoices
- A call log: date, time, who you spoke to at the insurance company, and what was agreed
- Notes on any items you had to remove for safety before they could be photographed, with as much photographic backup as possible
That last point trips people up. If something is genuinely hazardous — black water-soaked materials, for example — photograph it thoroughly before removal even if removal has to happen fast. An adjuster cannot validate an expense for something that has no photographic record at all.
Aging Homes and Hidden Vulnerability
One reason documentation matters even more than most people realize: a large share of American homes already have underlying vulnerabilities that damage events can expose or worsen. The median age of owner-occupied homes is 40 years old, according to the latest data from the 2022 American Community Survey. Homes that age commonly have galvanized or cast-iron plumbing, older electrical systems, and decades of deferred maintenance that create secondary damage pathways the moment a loss event occurs.
When a pipe fails in a 1970s-era home, it rarely stays a simple pipe problem. Water finds every old crack in the subfloor, every gap around an aging floor penetration, and every compromised section of drywall compound. Your documentation has to follow those pathways, not just the obvious wet spot. An aging home’s damage story almost always extends further than it first appears, and a thorough photo and video record is what proves that story to your insurer.
This is also exactly where experienced local professionals earn their value. Teams that work these properties regularly know where water hides in a 50-year-old split-level and where smoke settles in a ranch-style home with an open soffit system. The NAHB’s Eye on Housing research published in February 2024 notes that the U.S. owner-occupied housing stock is aging rapidly, signaling that the need for thorough loss documentation will only grow as more of America’s homes pass the four-decade mark.
What Restoration Professionals Want to See When They Arrive
Professional restoration teams don’t just repair damage. They document it in their own format for insurance coordination, often using moisture meters, thermal cameras, and air quality readings. But your documentation and theirs serve different purposes. Yours establishes the pre-mitigation condition. Theirs establishes the scope of work performed. Both are necessary. Neither replaces the other.
When you work with Full-Service Property Restoration Experts in St. Cloud, you’re getting a team that handles the full chain from emergency mitigation through construction repair, and that experience means they can flag hidden damage that a solo homeowner walkthrough would miss. But they’re arriving after you. Your first-hour documentation is the baseline record they build their work on top of.
Share your binder with them when they arrive. A good restoration team will use your photos to compare against the current state and note any changes since the loss. That comparison supports a more complete scope of work and, ultimately, a fairer claim outcome.
The Two Mistakes That Sink Claims
| Mistake | What Happens | How to Avoid It
|
|---|---|---|
| Cleaning before documenting | Evidence of pre-mitigation damage is gone; adjuster cannot validate full scope | Run the STOP-WAIT-SHOOT pass before touching anything |
| Missing secondary damage areas | Smoke in distant rooms or water in hidden cavities is undocumented; claim gets disputed | Document every room, every closet, use raking light for smoke |
Both mistakes share the same root cause: treating documentation as an administrative chore rather than the first act of your recovery. Flip that mindset. Your phone camera is the most important tool you pick up in the first hour, more important than a mop, more important than a fan, more important than calling anyone. Get the record. Then get to work.
Good documentation doesn’t just protect your claim. It gives every professional who touches your home — restoration crew, contractor, adjuster — a shared understanding of what actually happened. That shared record is what turns a chaotic loss event into a managed, recoverable situation.