Gold is one of the hardest things to photograph well, and online it gets judged by the picture alone. A shopper can’t feel the weight or see the polish in person. All they have is the photo. If it looks flat, orange, or full of glare, the piece looks cheap, whatever it’s worth.
The good news is that you don’t need a lightbox or a hired photographer. A phone, a window, and some white card get you most of the way there. This guide covers how to photograph gold jewelry at home so it looks like what arrives in the box. The advice works for any inventory, including pieces from Golden Planet USA, a gold jewelry manufacturer with production in Turkey and distribution from New York’s Diamond District.
Why gold is harder to photograph than other jewelry
Polished gold behaves like a small curved mirror. Whatever sits near it shows up in it: the window, a lamp, your hands, the phone. A necklace that looks perfect to the eye can come out with a dark blotch that turns out to be your own shirt.
Color is the second problem. Gold is warm to begin with, so a yellow room bulb pushes it toward orange, and cool light drains it into something pale and slightly green. Your customer is also reading karat from color. A 14K piece is lighter and a little paler than 18K, and if your photo gets that wrong, you’ve set an expectation the package can’t meet.
Then there’s size. Jewelry is small, and at close range the camera keeps only a sliver in focus. The clasp is sharp, the chain is blurry, and nothing looks quite finished.
None of this is hard to fix. It just needs a few habits.
What you actually need
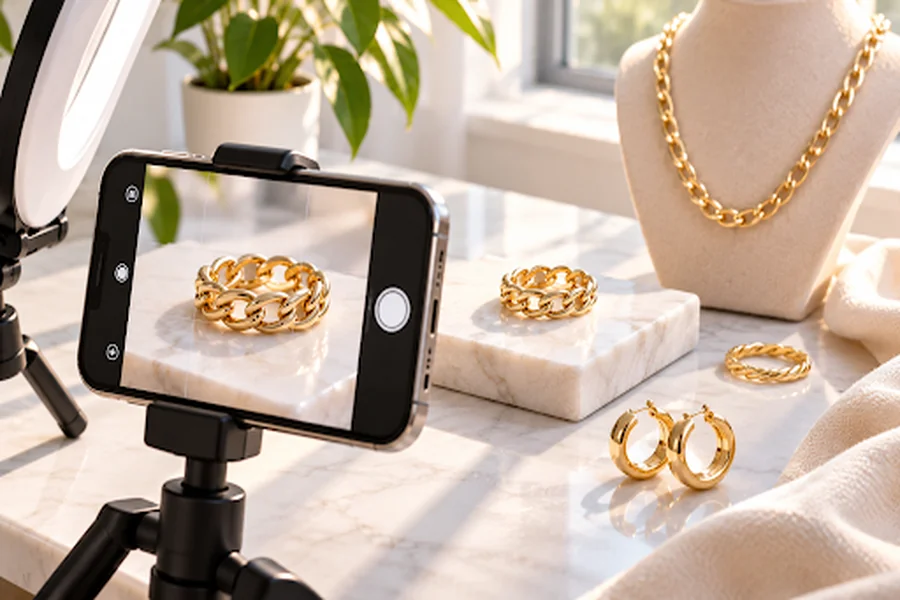
Here is what you need to take jewelry photos without a studio, and nearly all of it is probably in your house already.
- A phone with a decent camera. Anything from the last few years will do.
- A window that isn’t getting direct sun. Bright but indirect is ideal.
- A diffuser: a white bedsheet, a sheet of tracing paper, or baking parchment taped over the glass.
- A white card or foam board to bounce light back into the shadows.
- A plain backdrop: white paper, a gray card, or a smooth ceramic tile.
- A tripod, or a stack of books and a phone holder.
- Jewelry putty or a little museum wax to hold small pieces in place.
- A microfiber cloth, a soft brush, and a small air blower. Dust and fingerprints show up huge on gold.
If you can only buy one thing, buy the tripod. A steady phone fixes more problems than any other single change.
Setting up the light
Put a table beside the window so the light comes in from the side, not from behind or above. Hang your diffuser between the window and the piece. The light should look soft and even, with no hard edges to the shadows.
Place the white card on the opposite side of the piece. It bounces gentle fill light into the shadows and gives the gold something bright to reflect, which stops it from going muddy and dark.
Turn off every lamp in the room. Mixing window light with warm bulbs is the fastest way to ruin your color, and you can’t fully fix it afterward.
Glare needs patience. Reflections move with every tiny change of angle, so when you see a hot spot, nudge the piece a few degrees or slide the card a few inches and look again. Dark patches usually mean something dark is reflecting in the metal. Fill that side with white.
Phone settings that matter
How to photograph jewelry with your phone mostly comes down to five small habits.
Wipe the lens first. A phone that lives in a pocket has a greasy lens, and the haze it adds makes gold look dull.
Tap the screen on the piece to focus, then slide the exposure down a little. Gold is bright, and highlights that blow out to pure white can’t be recovered.
Turn the flash off. Direct flash on polished metal gives you a white glare and a flat, cheap look.
Use the 2x or telephoto lens, or the macro mode if your phone has one, rather than pinching to zoom. Digital zoom just crops and softens the image. Shooting from a bit further back also makes your own reflection smaller.
Use the self-timer, or the volume button on your earbuds, so your finger doesn’t shake the phone. Shoot at the highest resolution, and switch on the grid so horizons and edges stay straight.
The shots every listing needs
Customers decide quickly, so give them what they’d want to see if they were standing at the counter.
- A clean front view on a plain background. This is your main image.
- An angled view that shows depth and shape.
- A scale shot, on a hand, an ear, or a neck, so people understand how big the piece is.
- A close-up of the clasp and the karat stamp. Buyers of gold care about this one.
- The back or inside, since that’s where finishing quality shows.
Adjust for the type of piece. Earrings need a pair and one side profile. Chains should lie flat at full length, plus a macro of a few links. Bracelets should be shown closed, with the clasp visible.
Keeping the color true
Set white balance by eye against the real piece. A trick that works: put a white card in your first frame and use it as a reference when you edit, so white really looks white. Then hold the real piece next to the screen in daylight and compare.
Don’t push the saturation slider to make the gold “pop.” It looks great for a moment, and then the customer opens the box and finds something paler than the photo promised. That’s how returns start.
Be honest about karat. If you stock both 14K and 18K, let the difference show. The deeper color of 18K is a selling point, and the lighter tone of 14K is perfectly normal. Check your photos on a phone and a laptop, because screens vary, and keep the same settings across the whole catalog.
A five-minute edit
You don’t need professional software. The editor built into your phone does the job, or a free app.
- Crop to one consistent shape, usually a square, and straighten the horizon.
- Lower the highlights slightly and lift the shadows.
- Adjust the white balance until your reference card looks neutral.
- Remove dust and tiny marks with the spot-healing tool.
- Add a touch of sharpening, and stop early.
- Export every image at the same size.
Resist heavy retouching. Smoothing the metal until it looks plastic makes shoppers distrust the whole listing.
Shooting a whole delivery in one session
The best time to photograph new stock is the day it arrives, when pieces are clean and unworn. Set up once and don’t touch the table. Put a small piece of tape on the backdrop to mark where each item sits, so every frame lines up.
Work in batches. Clean everything first. Shoot all the fronts, then all the angles, then all the details. Group by category, such as earrings together and chains together, so your lighting adjustments carry over.
Try to finish within two or three hours. Window light shifts as the day goes on, and a morning photo and an afternoon photo of the same piece can read as two different golds.
Start each item with a photo of its tag or SKU card. When you sort files later, that frame tells you where one product ends and the next begins. It sounds fussy, and it saves a surprising amount of confusion at upload time.
Mistakes that make gold look cheap
Flash is number one. Mixed lighting is number two. After that, the list is short:
- A visible reflection of the photographer, the phone, or a messy room.
- Over-saturated color that no longer matches the real piece.
- Heavy retouching that smooths the texture off the metal.
- Fingerprints, lint, and dust left on the piece.
- Cluttered or dark props that fight with the jewelry.
- A different crop and background on every product, so the shop looks patched together.
- Low-resolution images that fall apart when someone zooms.
Final thoughts
Good jewelry photos don’t depend on gear. They depend on a window, some patience, and one setup you don’t change halfway through. Shoot a test piece this week, compare it with the real thing in daylight, and adjust until they agree. When your next delivery of wholesale gold jewelry arrives, give yourself one afternoon and photograph it all while the setup is fresh.