Editing photos often involves only changing one element. The goal is to brighten the face of a person. It is necessary to darken an unattractive sky. It is difficult to do this manually. It is important to draw carefully around the subject by using your mouse. It requires steady hands and lots of patience. A single mistake could ruin the result. This is a painful process that can impede creative thinking.
Think of a sophisticated assistant who sees your picture just like you see it. It can instantly identify a person or a vehicle or even a tree. It is able to separate from the subject of the background in a single press. The power behind this is artificial intelligence. The ai subject mask editor is a clever helper. It allows precise changes to the local adjustment ai editor modifications. This guide will help you learn how to utilize these extremely powerful tools to improve the editing workflow.
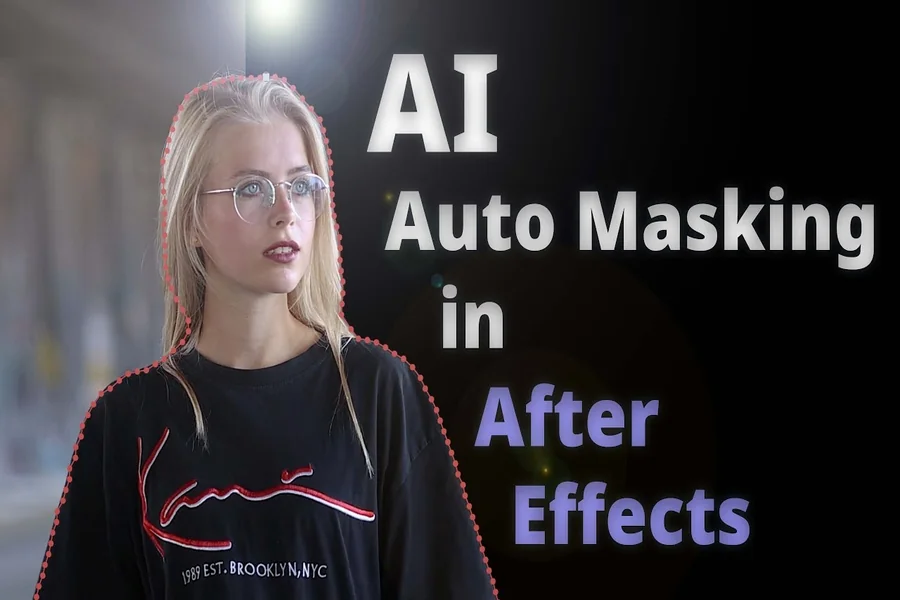
Master Local Adjustments: The Essential Guide to AI Masking and Layering
What Are AI Masking Tools?
To begin, you must first understand what a “mask” is.” For editing purposes it is the mask functions as the digital equivalent of a stencil. It shields certain areas of your image while you edit the other elements. In the event that it is necessary to mask the sky it is possible to alter the color while not affecting the buildings beneath. Masks were traditionally created using a manual, technical skill.
AI masking tools automate this. They employ artificial intelligence trained on millions of pictures. The AI detects everyday objects as well as individuals. If you press “Select Subject,” the AI analyzes all of the images. It finds pixels that are part of the primary subject. It creates a flawless mask over it in a matter of minutes. It is the main job of an AI subject mask editor. It takes care of the mundane job for you.
The Two Key Mask Types: Subject and Background
These tools generally offer two main single-click choices.
- AI Subject Mask: This is a focus on the principal foreground component. The subject is generally an object, a person as well as an animal or a vehicle or even a product. The AI scans for the edges of the subject. It makes the mask which separates the subject from all other objects. It is then possible to edit just the subject.
- AI Background Mask: This is the reverse. It filters out everything that’s NOT the primary subject. By one click, you mask the whole background. You can remove it from view, darken it, or modify its color independently. The separation is the very first stage to create powerful local adjustments and editor effects.
The Masking Bottleneck Solved: Your 5 Step Guide to AI Selection
Utilizing using these tools is straightforward. Follow these steps for making intricate editing with speed and ease.
Step 1: Open Your Image and Find the AI Tool
Start your photo with an editor that supports it. Adobe Lightroom and Photoshop have these tools. They also have Luminar Neo and other modern software. You can look for buttons marked “Select Subject” or “Masking” that have the AI icon. This will lead you to AI’s subject mask editor.
Step 2: Create Your Initial Mask
Select the “Select Subject” button. Wait a moment. Then, you will notice an overlay typically with white or red colors that appears on top of the subject. It is because the AI is the one who created the mask.
When you press “Select Background,” the overlay will be covered by the rest of the background. Check out the mask for confirmation that the AI’s choice is accurate. Find clean edges within hair or fur.
Step 3: Refine the Mask (If Needed)
The AI may be flawless, but it isn’t completely. Be assured. You are able to refine it quickly. Make use of brush tools for “Add to” or “Subtract from” the AI mask.
Paint over areas that the AI did not recognize. Eliminate areas it added because of a mistake. The AI will give you the perfect 90% start position. It is possible to finish the last 10% of polishing within seconds and not in minutes.
Step 4: Apply Your Local Adjustments
The next step is the creative next step. Once you have the subject or background masking, you’re in a position to edit. Here is the place to use adjustment ai editor’s power. The adjustments made will only have an effect on the area you mask.
Adjust the sliders without fear. The sliders can brighten your subject without destroying the sky. It is possible to add clarity for a person’s eyes. It is possible to completely alter the color of your background hue.
Step 5: Combine Masks for Advanced Effects
Don’t settle for a single, basic mask. Design a precise subject mask using your local adjustment AI editor to isolate your main focal point—a person, a product, or a key object. Make your tonal and color adjustments here. Next, add a second, distinct mask for the background. Treat it as a separate layer, allowing you to darken, blur, or desaturate it independently to make your subject pop.
For even more control, create a third mask specifically for the sky. This layered approach allows you to control every element of your photograph with surgical precision, without needing to be a masking master.
Real-World Editing Applications
What does this mean for real improvement in your photo? These are the most common ways to use it:
- Portrait Perfection: Apply an AI Subject Mask editor for the person. After that, you are able to smoothly make them appear more attractive by enhancing the appearance of their skin. Then, you can lighten their teeth slowly. It is possible to add an attractive light to your eyes. It is possible to increase the sharpness on the details of their outfits. Without touching their background.
- Landscape Drama: In the case of a landscape it is possible that it is possible that the “subject” might be a mountain. It is best to mask the mountain. It will increase the texture and dehaze to let it shine. After that, mask the sky separately. Enhance the blue to deepen it and increase cloud contrast. In the end, mask the foreground meadow. Make it more vibrant. It was edited by three zones separately in just a few just a few minutes.
- Product Photography: Isolate the product by using a subject mask. Modify the product’s exposure and color so that it is the perfect color and exposure. Next, mask the background. Create a pure white background or soft grey. It creates a sleek, professional studio look without needing a physical studio.
- Object Removal and Replacement: Mask the background. When you have selected the background, you can make use of content-aware fill to erase unneeded objects from that region. Also, you could completely transform a boring sky with a striking one since you’ve got an ideal selection of the sky region.
Imagen AI: The Best AI Mask Tool
Imagen AI stands apart as the most effective tool to use for subject as well as background masking, because it develops a deep personalized knowledge of your particular photography. Contrary to other standard AI editors Imagen is based on your portfolio.
Imagen trains on your portfolio, learning not just to determine the “subject,” but to discern your common subjects–be it your wedding veil as well as a particular product’s texture or even the fur of your pets that you often photograph. The result is masks with incredible initial precision, particularly in those that have nuanced edges as well as the common details for your niche.
Additionally, Imagen’s intelligence extends to local adjustments. When you’ve created a mask, its recommended edits are guided by your individual style. If you frequently darken background to make your subject appear more attractive, Imagen’s adjustment ai editor applies that identical nuanced darkness instantly. This doesn’t make just an adjustment; it implements the specific editorial intent on that selected section.
The Future of Subject Mask Editor Tools
The future of subject mask AI editor technology is becoming more sophisticated. We’re seeing tools which can mask particular objects, such as “cars” or “foliage” by using the command. In the near future, you might be able to tell the AI “select all the wedding dresses in this gallery” and the AI will follow.
The tools have moved from mere selection, to intelligent enhancement. Imagine pressing “Select Sky” and having the AI not just mask it, but recommend the best adjustments to make it appear more striking based on the moment of day that you have captured in your photograph.
Conclusion
Editing is a way to fulfill the potential of your creative vision, not to battle with software. AI masking tools eliminate the most technological barrier: precise selection. They provide you with a flawless mask that is the secret to the local adjustment ai editor power instantly.
Take advantage of the AI subject mask editor. Utilize the editor to isolate, refine, and modify the parts of your images. Save the time you used to devote to tedious choices. Instead, invest that time in investigating color as well as light and mood. Begin with the next picture. Hit the “Select Subject” button. Watch the magic happen before applying your artistry on the canvas the program provides. This is the latest clever, savvy, and creative approach to edit.